...
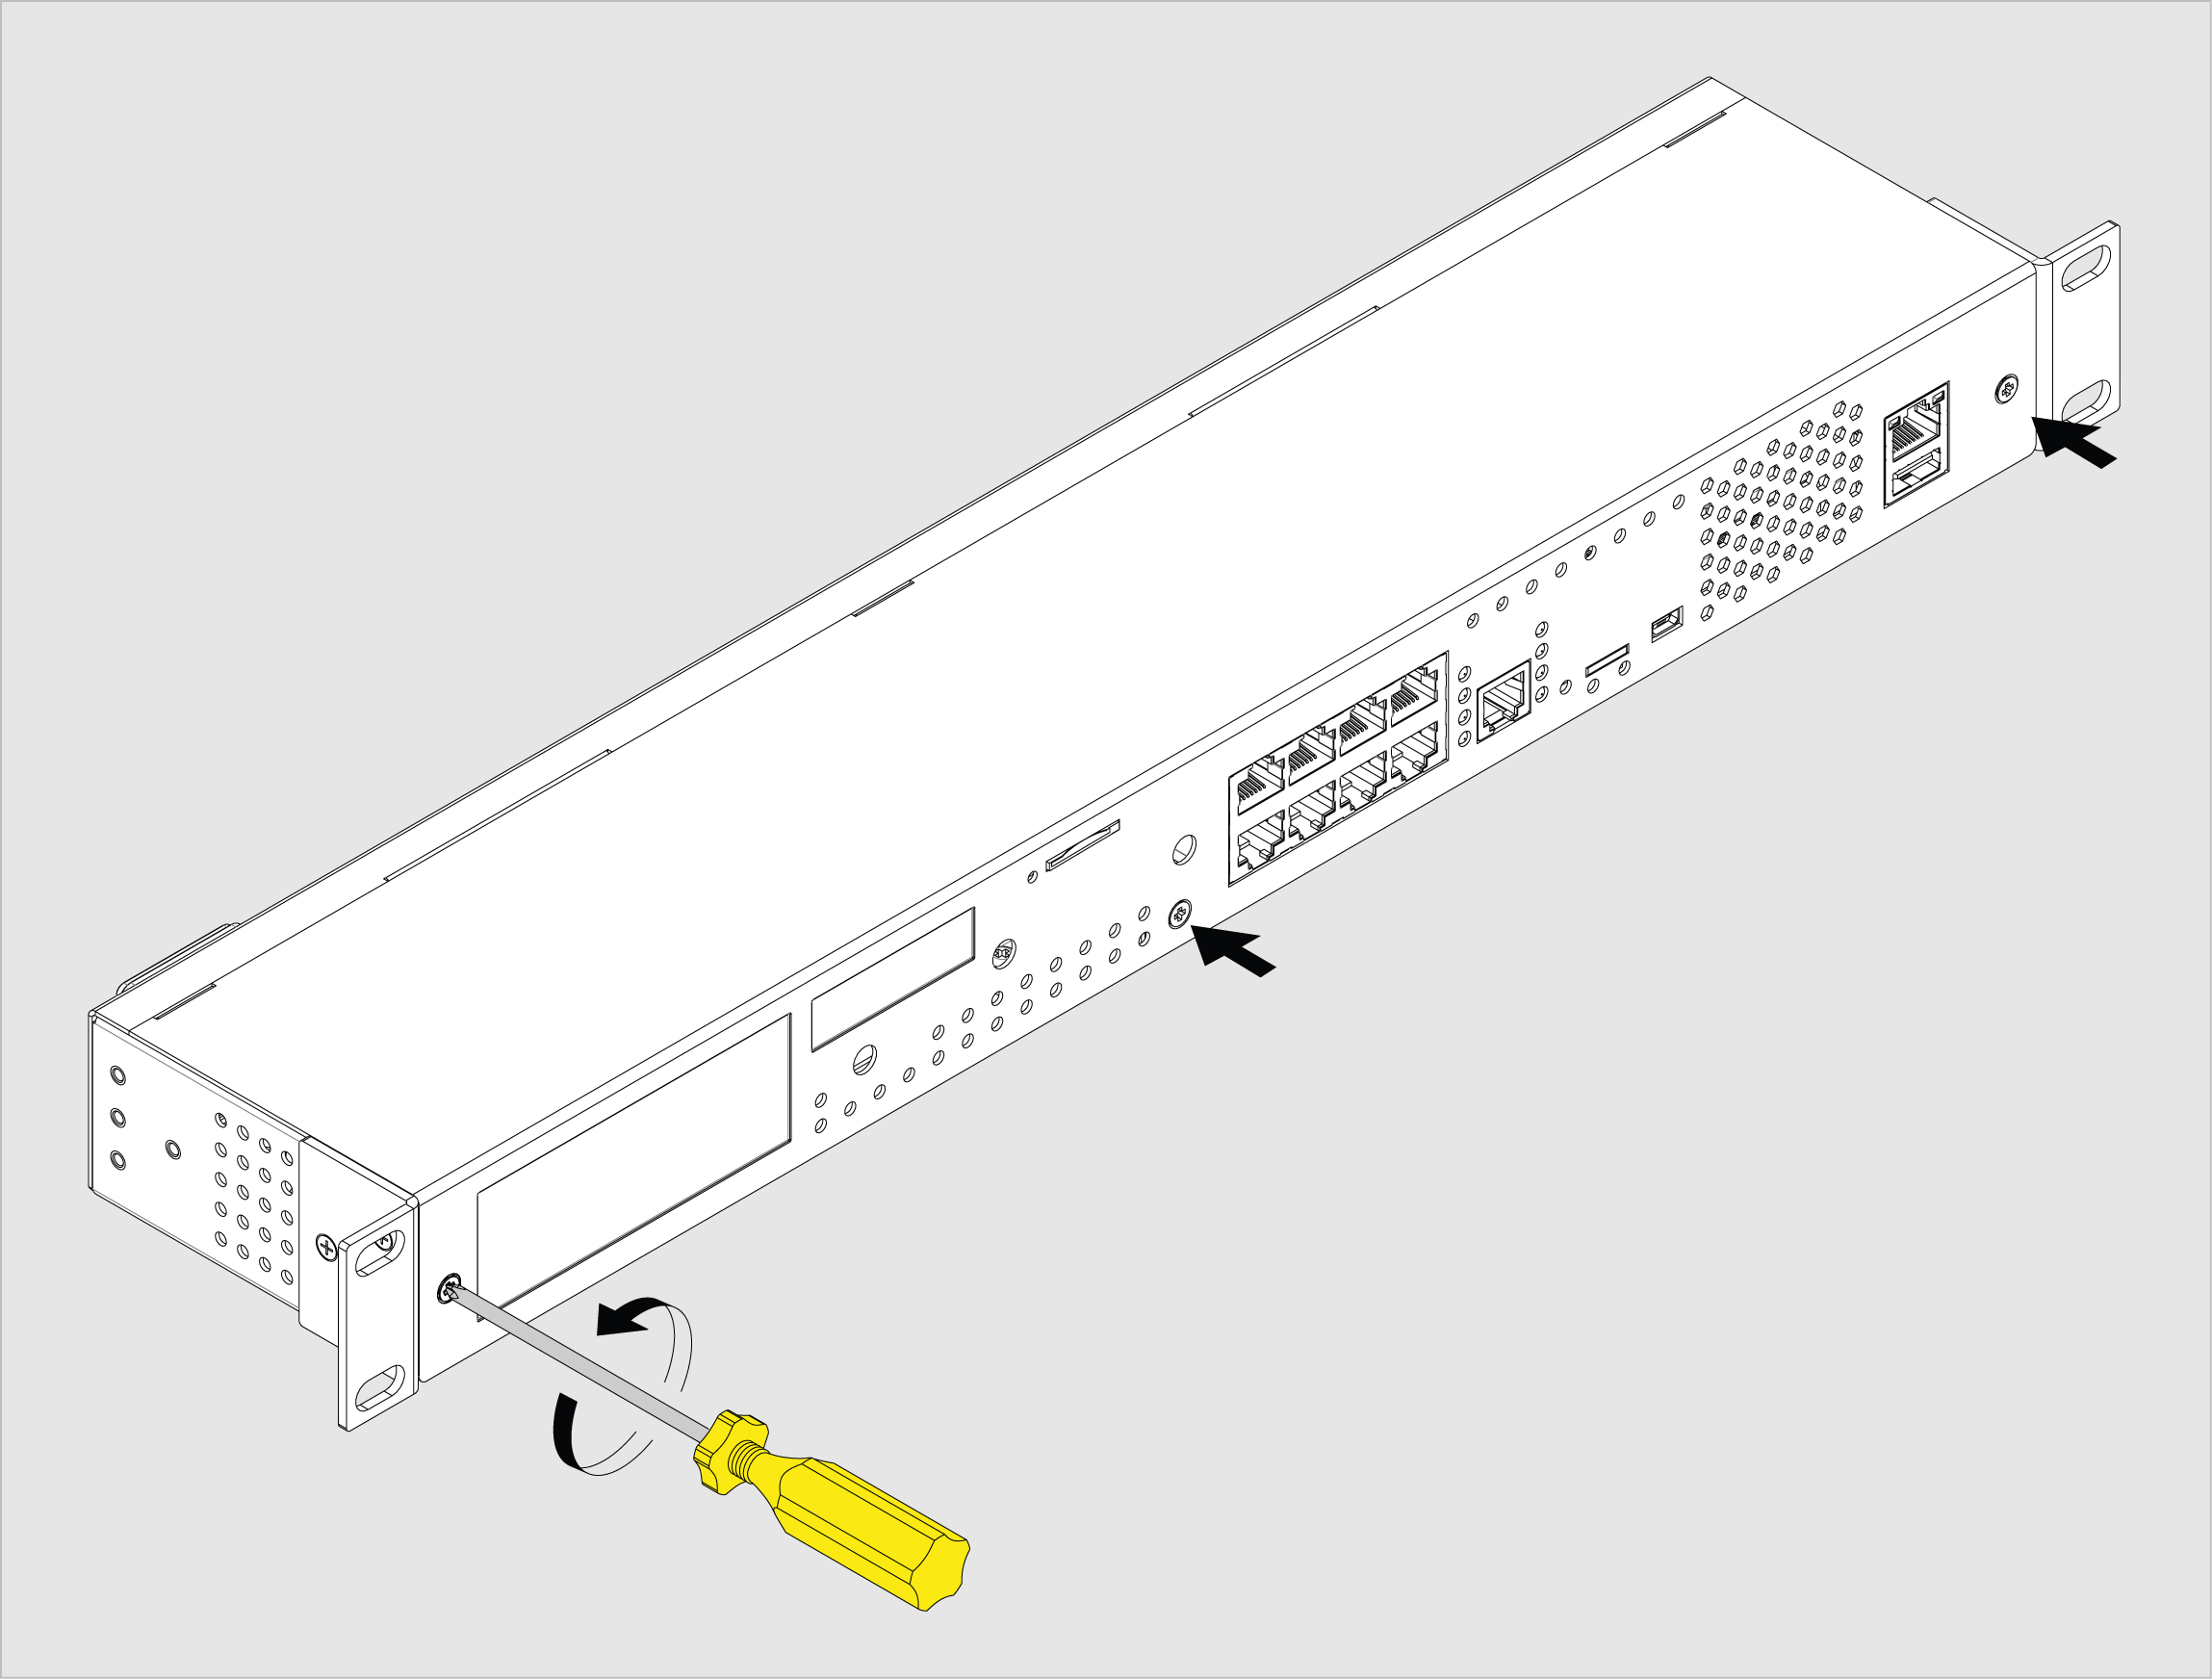
| 1 | Carefully unscrew the screws holding the cover and open it.
| |||
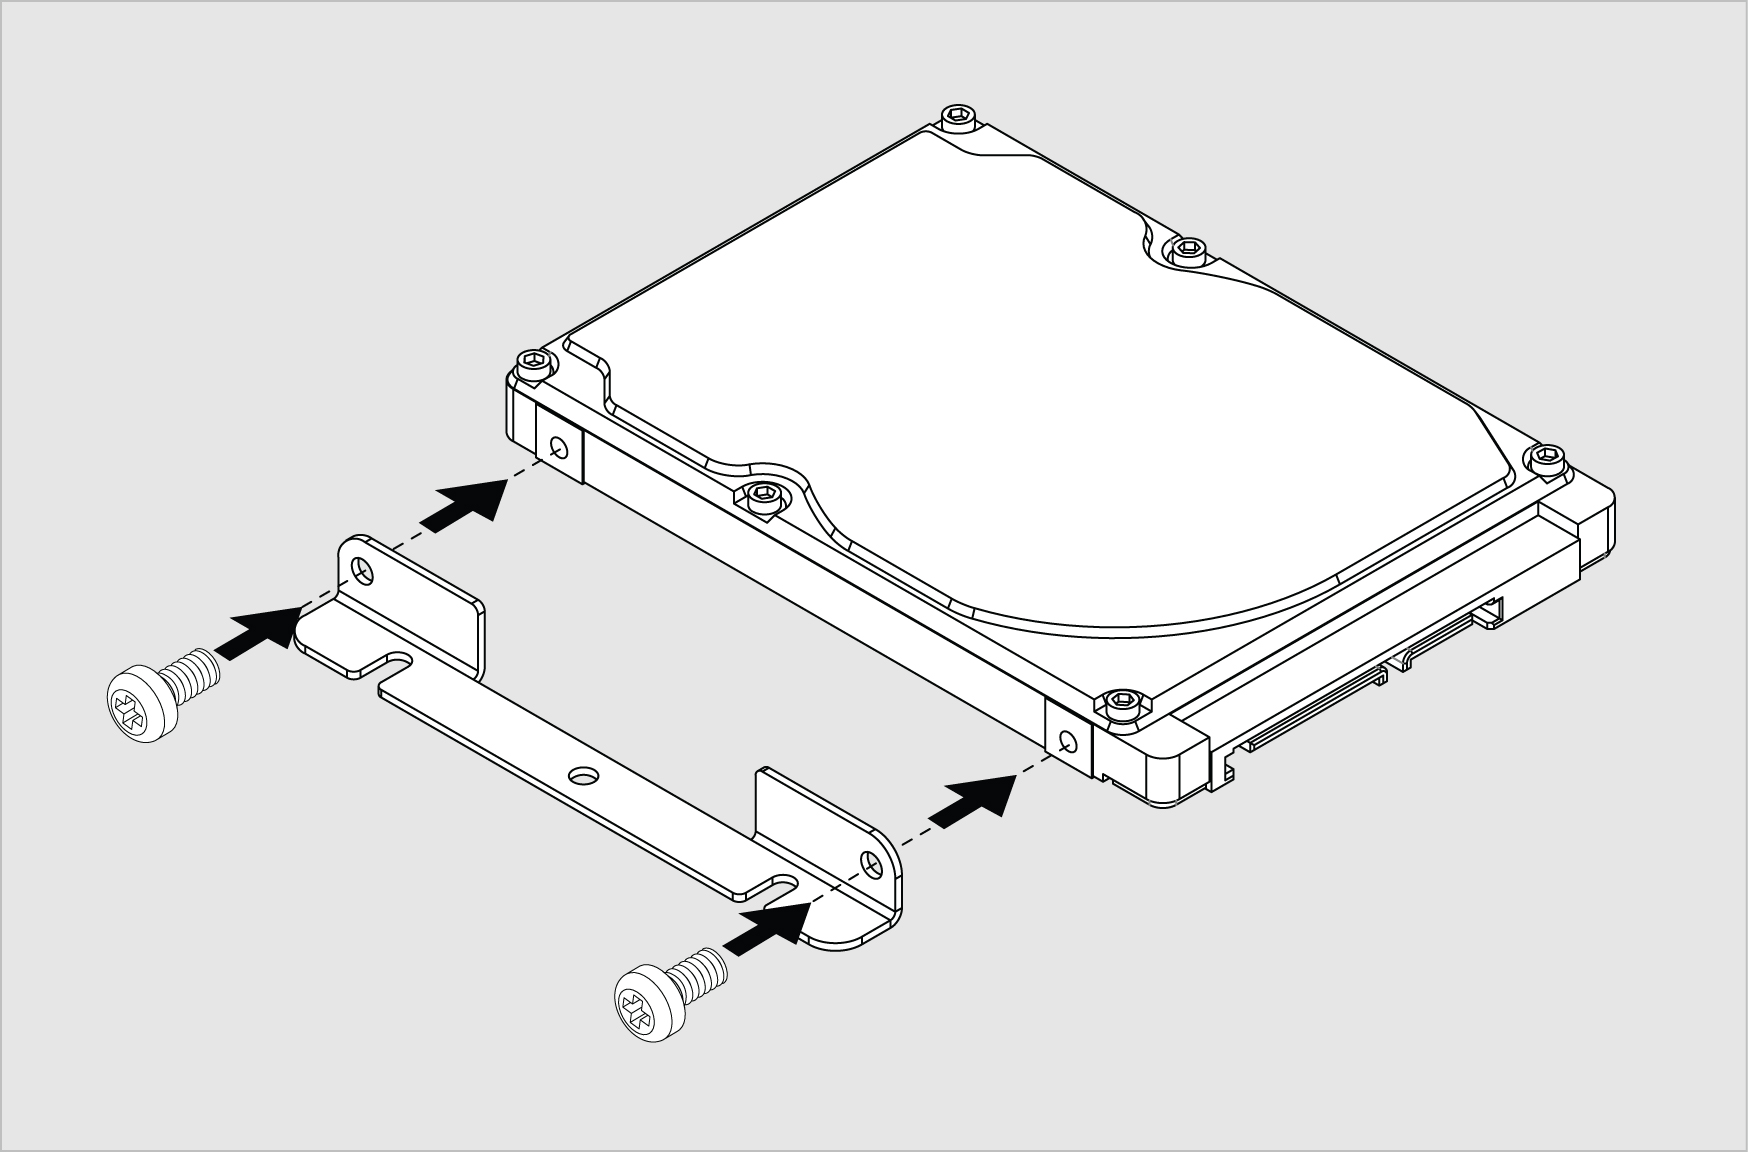
| 2 | Screw the mounting bracket to the 2.5" Hard drive. The mounting bracket is mounted inside the monitoring unit or sold separately together with the HDD. Use M3 screws. | |||
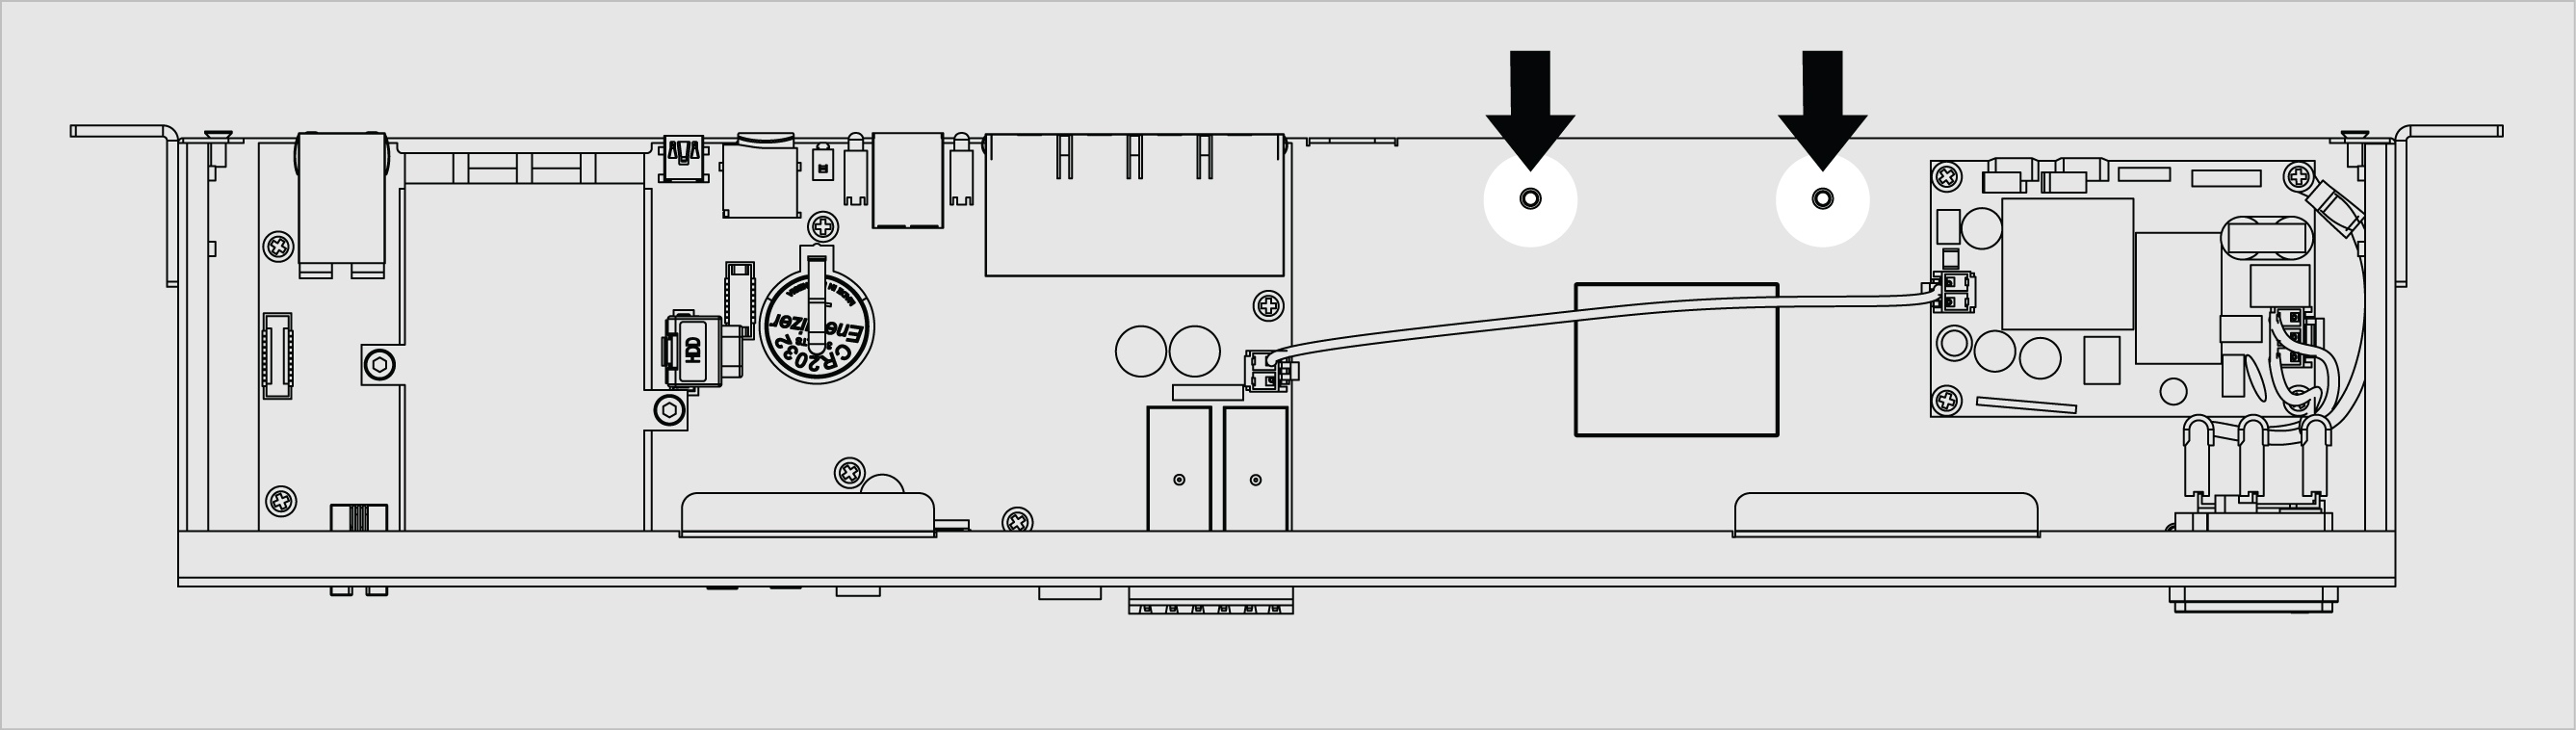
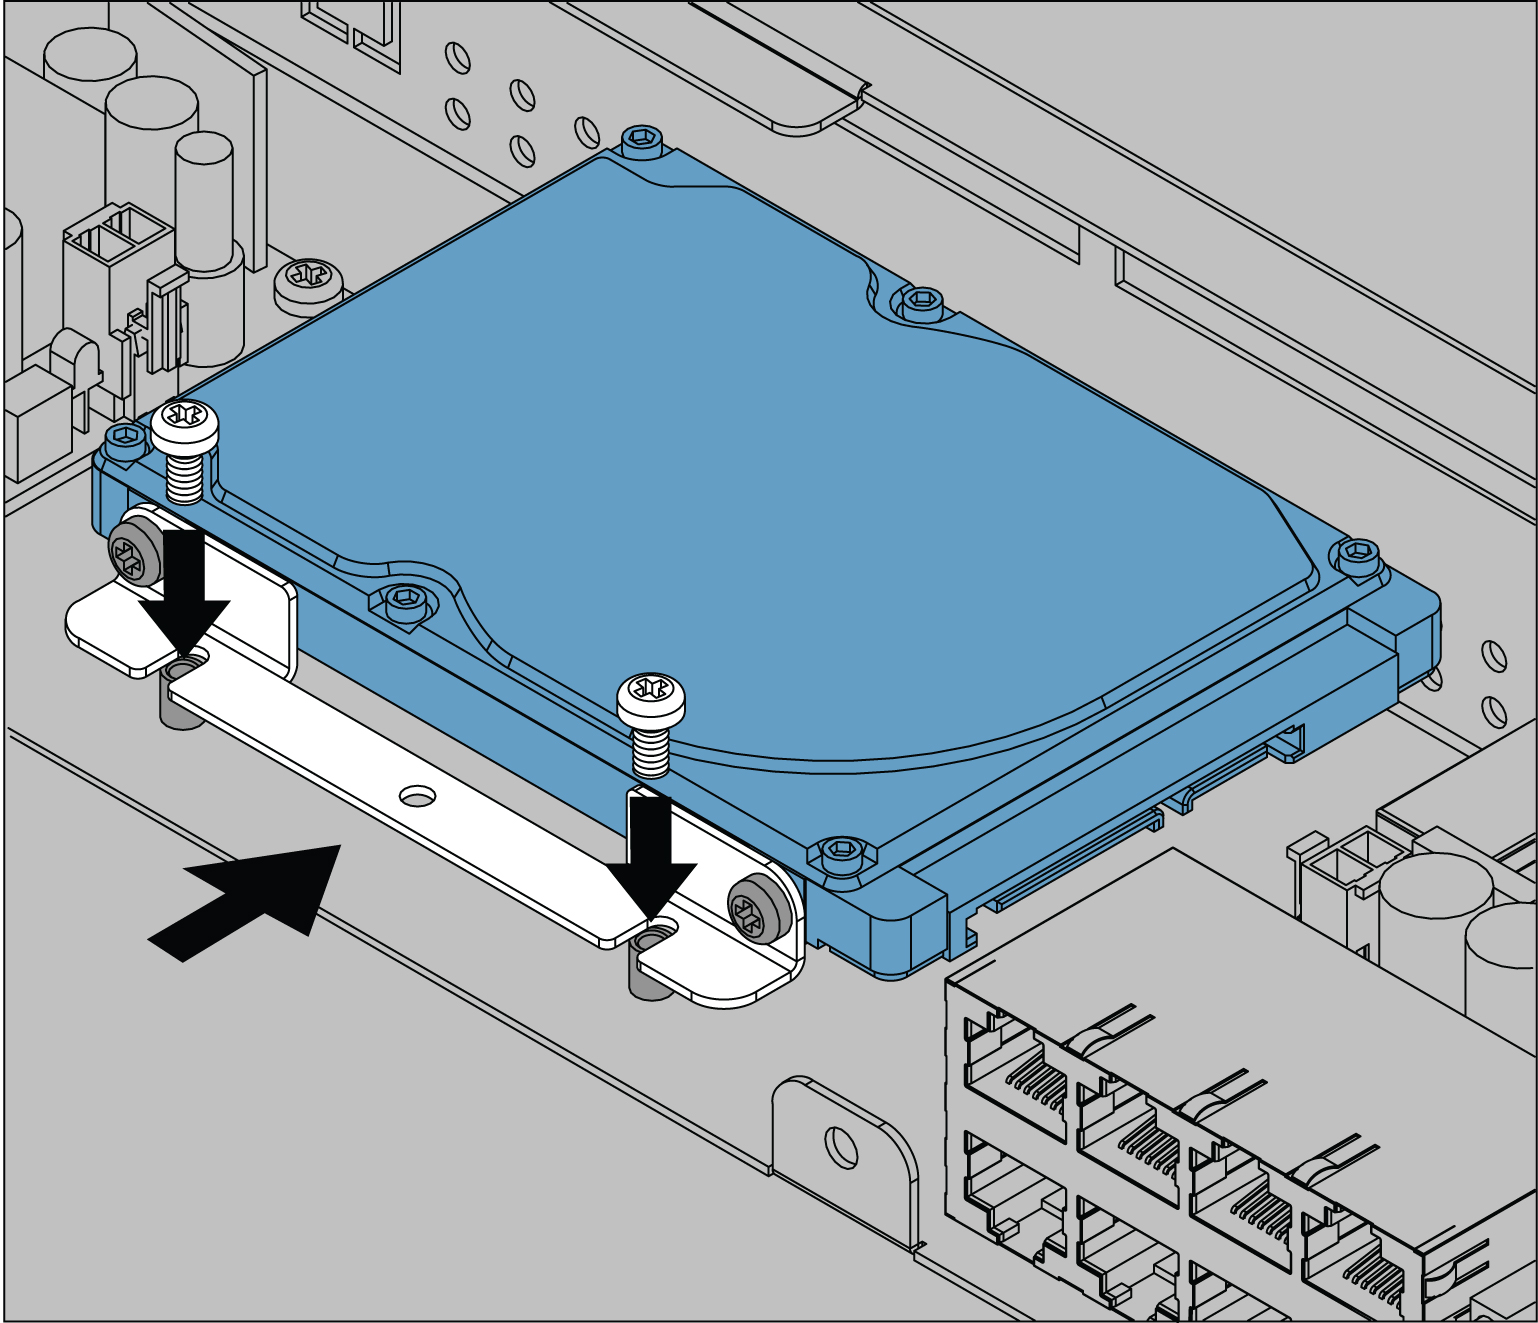
| 3 | Screw together the mounting bracket with the hard drive to the enclosure legs. These two legs can be found using the picture to the left. Use M3 screws. | |||
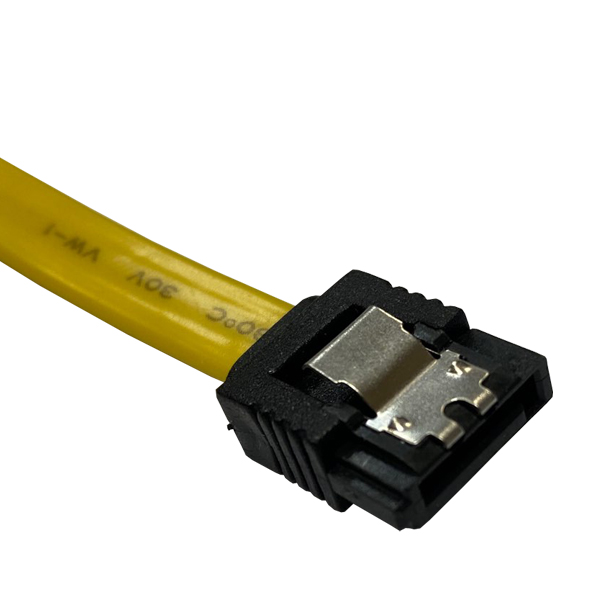
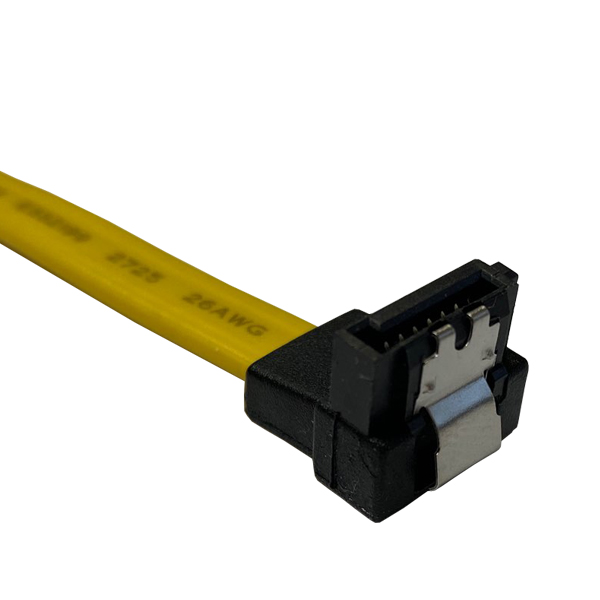
| 4 | SATA ATA data cable 90° clip | Connect the 90° end of the cable to the hard drive disk. The other end of the cable is connected to the MOLEX_67800-5001 connector on the main board of the unit. The cable can be purchased at www.tme.eu . | ||
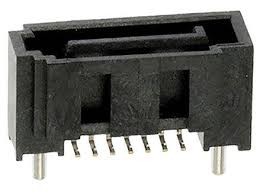
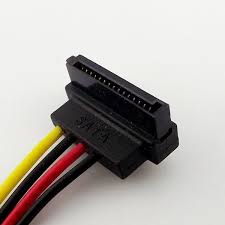
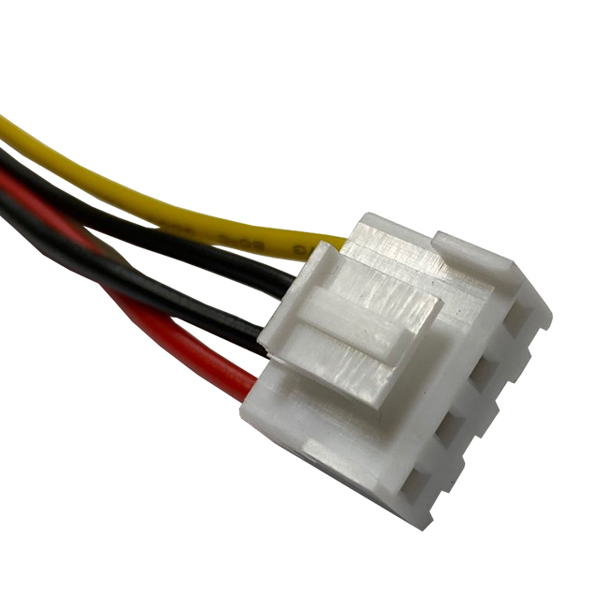
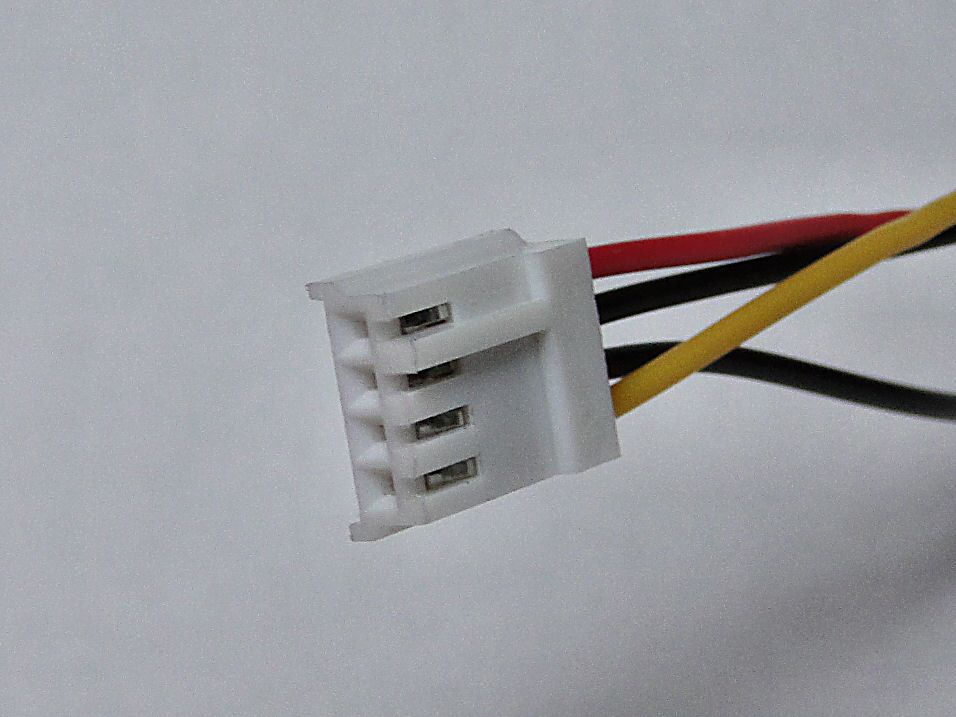
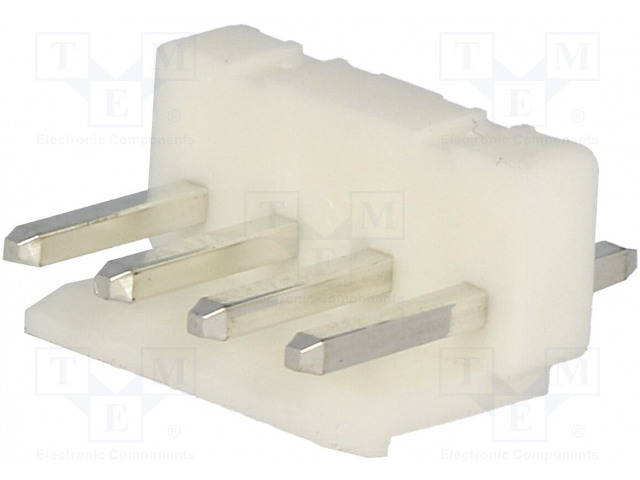
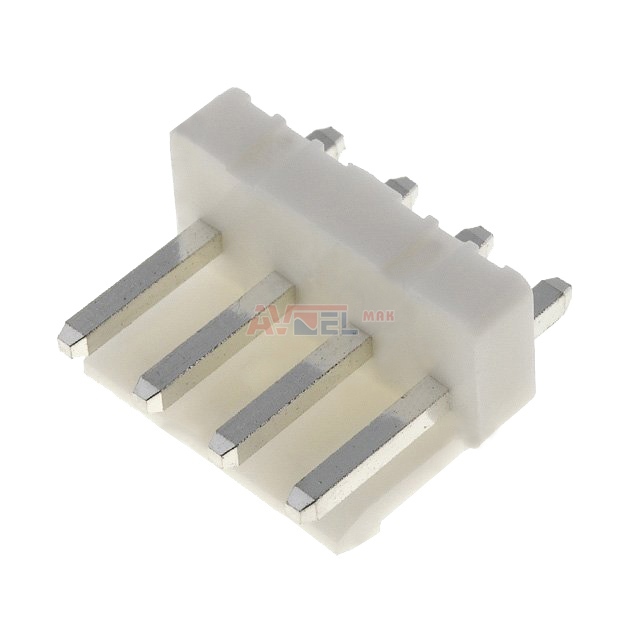
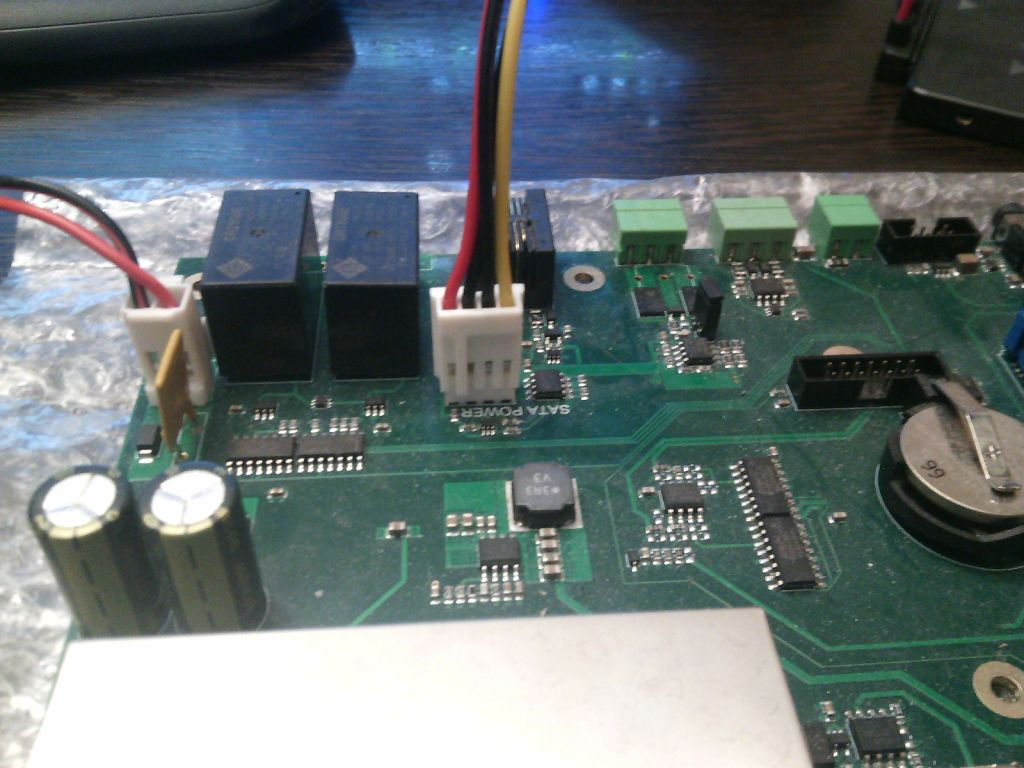
| 5 | SATA power cable: a) For older VT960 systems with a connector 3.96mm pitch.
Left connector: SATA power socket (use only 90 degrees) You can buy part of the connector at https://sk.farnell.com/startech/satapowadapr/lead-molex-right-angle-sata-power/dp/3402760?st=sata%20cable Right connector: Raster signal connector; female; 3.96mm; PIN: 4; NINIGI NS39-G4. You can purchase it from https://www.tme.eu/sk/details/ns39-g4/signalove-konektory-raster-3-96mm/ninigi/. b) For newer VT960 systems with a connector 2.5mm pitch.
Left connector: SATA power socket You can buy part of the connector at https://sk.farnell.com/startech/satapowadapr/lead-molex-right-angle-sata-power/dp/3402760?st=sata%20cable Right connector: 171822-4, Connector Housing, AMP EI, Socket, 4 Ways, 2.5 mm, AMP EI Series Contacts You can purchase 171822-4 connectors at https://sk.farnell.com/amp-te-connectivity/171822-4/socket-housing-4way/dp/150665 | 1. Connect the SATA power socket end of the cable to the hard drive disk. 2a. For older VT960 systems (3.96mm pitch). Connect the other NS39-G4 end of the cable to the NS39-W4PSocket (3.96mm; PIN: 4) on the mainboard.
2b. For newer VT960 systems (2.5mm pitch):
Connection should look like this:
| ||
| 6 | Use M3x10mm screws to screw the hard drive to the back wall of the enclosure. |
...
Configuring HDD settings
| Include Page | ||||
|---|---|---|---|---|
|
Configuring AV camera
| Include Page | ||||
|---|---|---|---|---|
|
...