Sensor configurations
To configure a sensor, go to "Main menu" >> "System tree" and click on the sensor element in the tree. A modal window with sensor properties will pop up. Change the needed settings and click "OK" or "Apply" at the bottom of the "Properties" window.
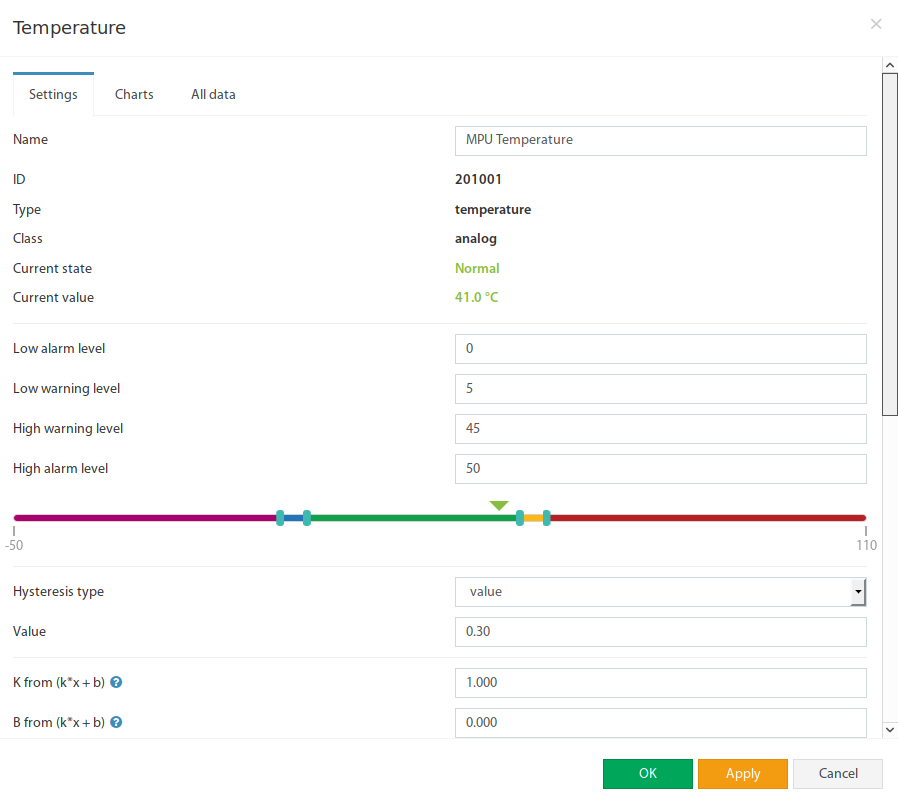
All sensors include:
| 1 | Name | The name is given by the system automatically. You can change it to anything you want. |
| 3 | ID | System ID of the element. |
| 4 | Type | Example: temperature, humidity, vibration. |
| 5 | Class | Examples: analog, CAN, switch, discrete. |
| 6 | Hardware port | The external port number on the device panel to which the sensor is connected (if the sensor is external). |
All sensors have threshold controls:
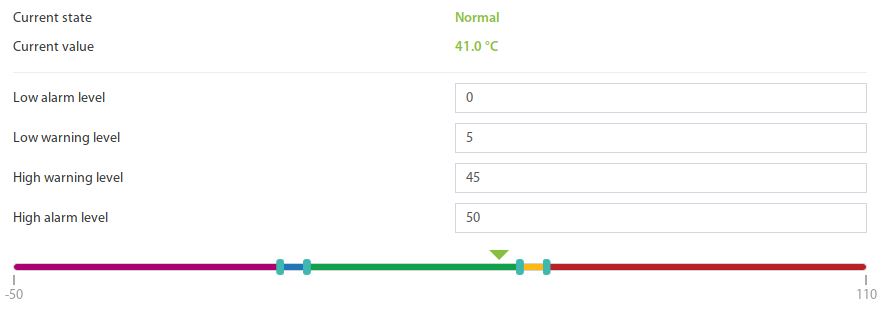
In the picture above, the "Current value" equals 41.0 and is represented by the small triangle. Currently, the triangle is green because it is situated in the "Normal" range. Hence the sensor says that "Current state" is "Normal". This value is used by the system "Logic schemes" menu to notify the administrator or take action.
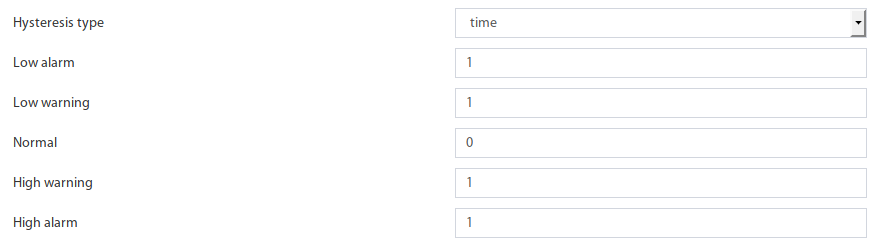
Hysteresis
Sensors have the option of setting the hysteresis state. Hysteresis can be a time, a value or it can be disabled.
If the hysteresis is set in a time, the sensor will transmit to a new state with a delay of the specified number of seconds in the corresponding field. The time counting will begin from the moment when the measured value of the sensor has left the current range.
Each state has its own field. Which determines the time that the sensor value must continuously hold for the state to change to the specified.
If you set the hysteresis by value, the sensor transition to a new state will occur when the measured value of the sensor exits beyond the current range, adjusted for the specified hysteresis value.

You can calibrate the sensors. Use K and B coefficients. After the calibration, please, save the values in flash memory.
To save sensor properties in the device flash memory press "  " then "OK" to confirm.
Example: Why do we need to use Hysteresis
Let’s say that we have a temperature sensor. Let’s say that we have set up threshold values.
We have set the value 25.5 °C to be a threshold value between Normal/Alarm states.
If the temperature drops just below 25.5 °C You will have a “Normal” state.
If the temperature goes just above 25.5 °C You will have a “Warning” state.
Sometimes the temperature may stay at 25.5 °C and jump up and down by 0.1-0.3 °C. In this case, You will get too many notifications that the sensor is showing a Warning or Normal state.
In this case, we need to use a Hysteresis.
If the type “time” is chosen, the system will wait for a specified time before the State of the sensor is declared.
If type “value” is used, unless the temperature drops by a larger amount than specified, the sensor state will not be declared.
Tuning the sensor value
Sensor readings can be tunned by a linear formula "y = k * x - b"
Example VT407 + HAT-100Q1 / AC current converter:
Metered current for HAT: from 0 to 100A (This means that the range equals 100, k = 100)
The output of VT407 is 0-5V (That means that the range is equal to 5)
"b" = the value that the sensor shown in WebUI when there's no current. Let's say that b = + 0.021
You should use the following formula for HAT: 100/5*(x-y)
The expression formula would be 20*(x-0.021)
Point is used as decimal separator (3.14)
Example: Using fuel tanks.
Each fuel tank has its own formula for volume vs height. Please see this useful resource for finding out such a formula.
https://www.calculatorsoup.com/calculators/construction/tank.php
In this can, You need to use non-linear formula.