...
To configure a sensor, go to "Main menu" >> "System tree" and click on the sensor element in the tree. A modal window with sensor properties will pop up. Change the needed settings and click "OK" or "Apply" at the bottom of the "Properties" window.

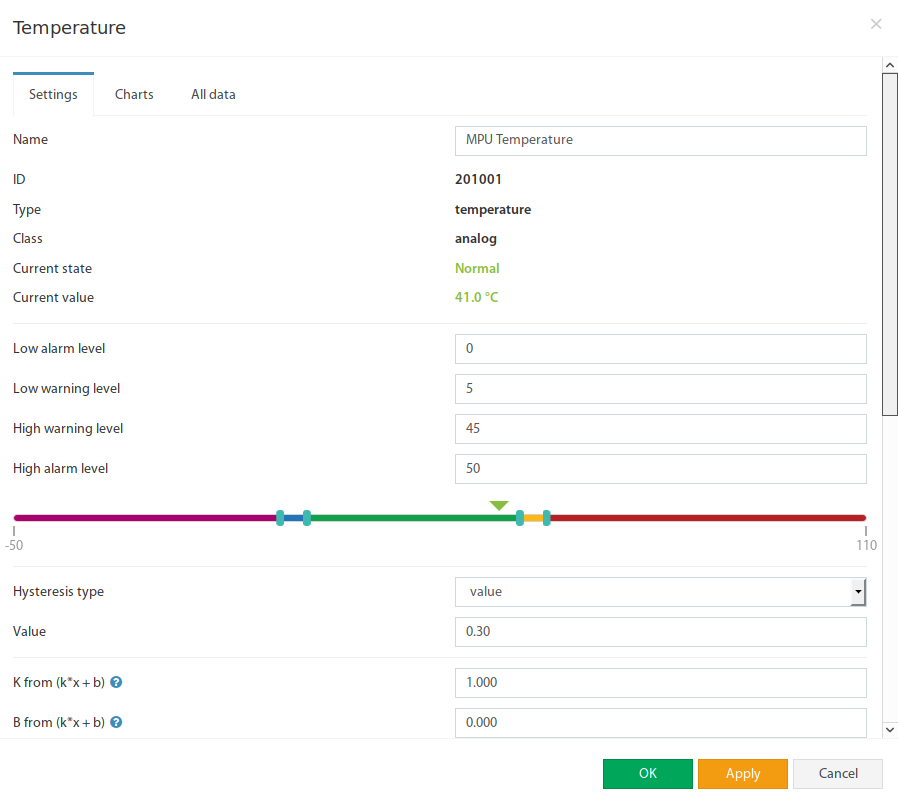
All sensors include:
| 1 | Name | Name is given by the system automatically. You can change it to anything you want. |
| 3 | ID | System ID of the element. |
| 4 | Type | Example: temperature, humidity, vibration. |
| 5 | Class | Examples: analog, CAN, switch, discrete. |
| 6 | Hardware port | Номер внешнего порта на панели устройства к которому подключен датчик (если датчик внешнийThe external port number on the device panel to which the sensor is connected (if the sensor is external). |
All sensors have threshold controls:

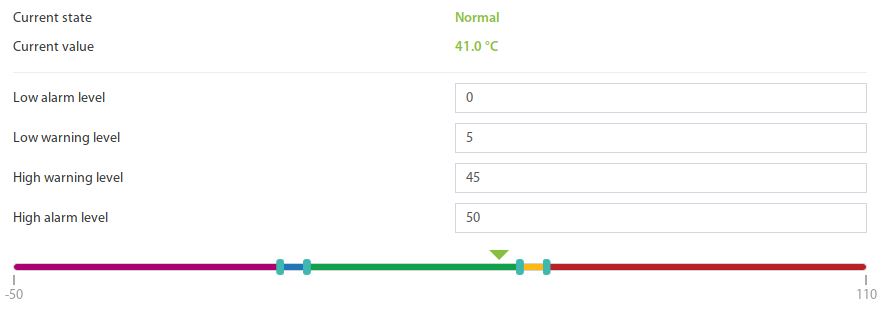
On the picture above, "Current value" equals 2441.5 0 and is represented by the small triangle. Currently the triangle is red green because it is situated in an "High alarmNormal" range above "High alarm level", which equals 20.0. Hence the sensor says that "Current state" is "High alarmNormal". This value is used by the system "Logic schemes" menu to notify the administrator or take action.
...
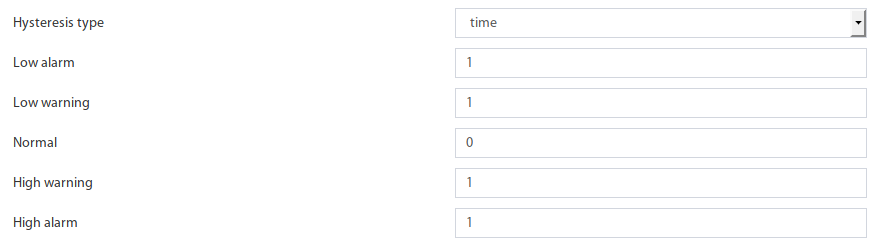
If the hysteresis is set in a time, the sensor will transmit to a new state with a delay of the specified number of seconds in the corresponding field. The time counting will begin from the moment when the measured value value of the sensor has left the current range.

If you set the hysteresis by value, the sensor transition to a new state will occur when the measured value of the sensor exits beyond the current range, adjusted for the specified hysteresis value.


You can calibrate the sensors. Use K and B coefficients. After the calibration, please, save the values in flash memory.
...