Datasheet page: https://vutlan.atlassian.net/l/cp/aJLea5p1
Product page: https://vutlan.com/can-sensors/27-vt460-smoke-humidity-and-temperature-sensor.html
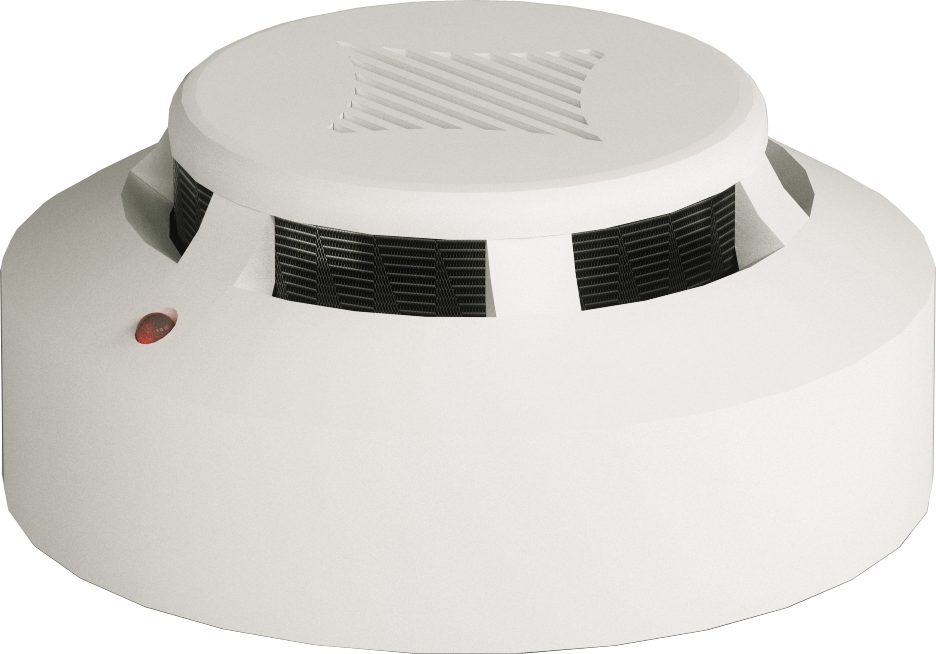
Function and purpose
Smoke, humidity, and temperature sensor with high smoke sensitivity and precise temperature, and humidity measurement. The detector responds to the appearance of the smoke of the low concentration.
Physical description
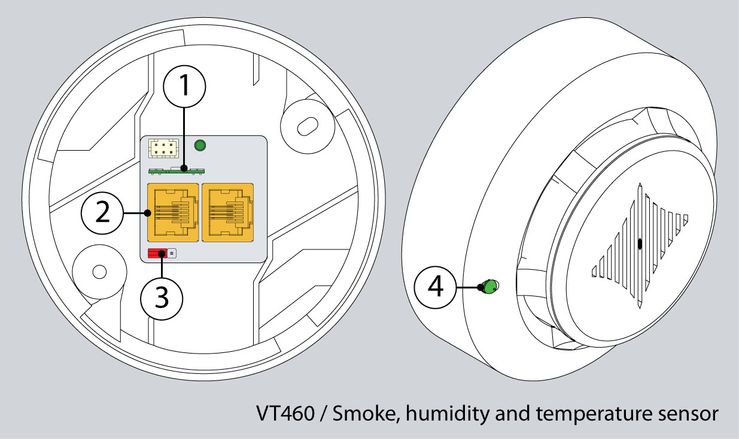
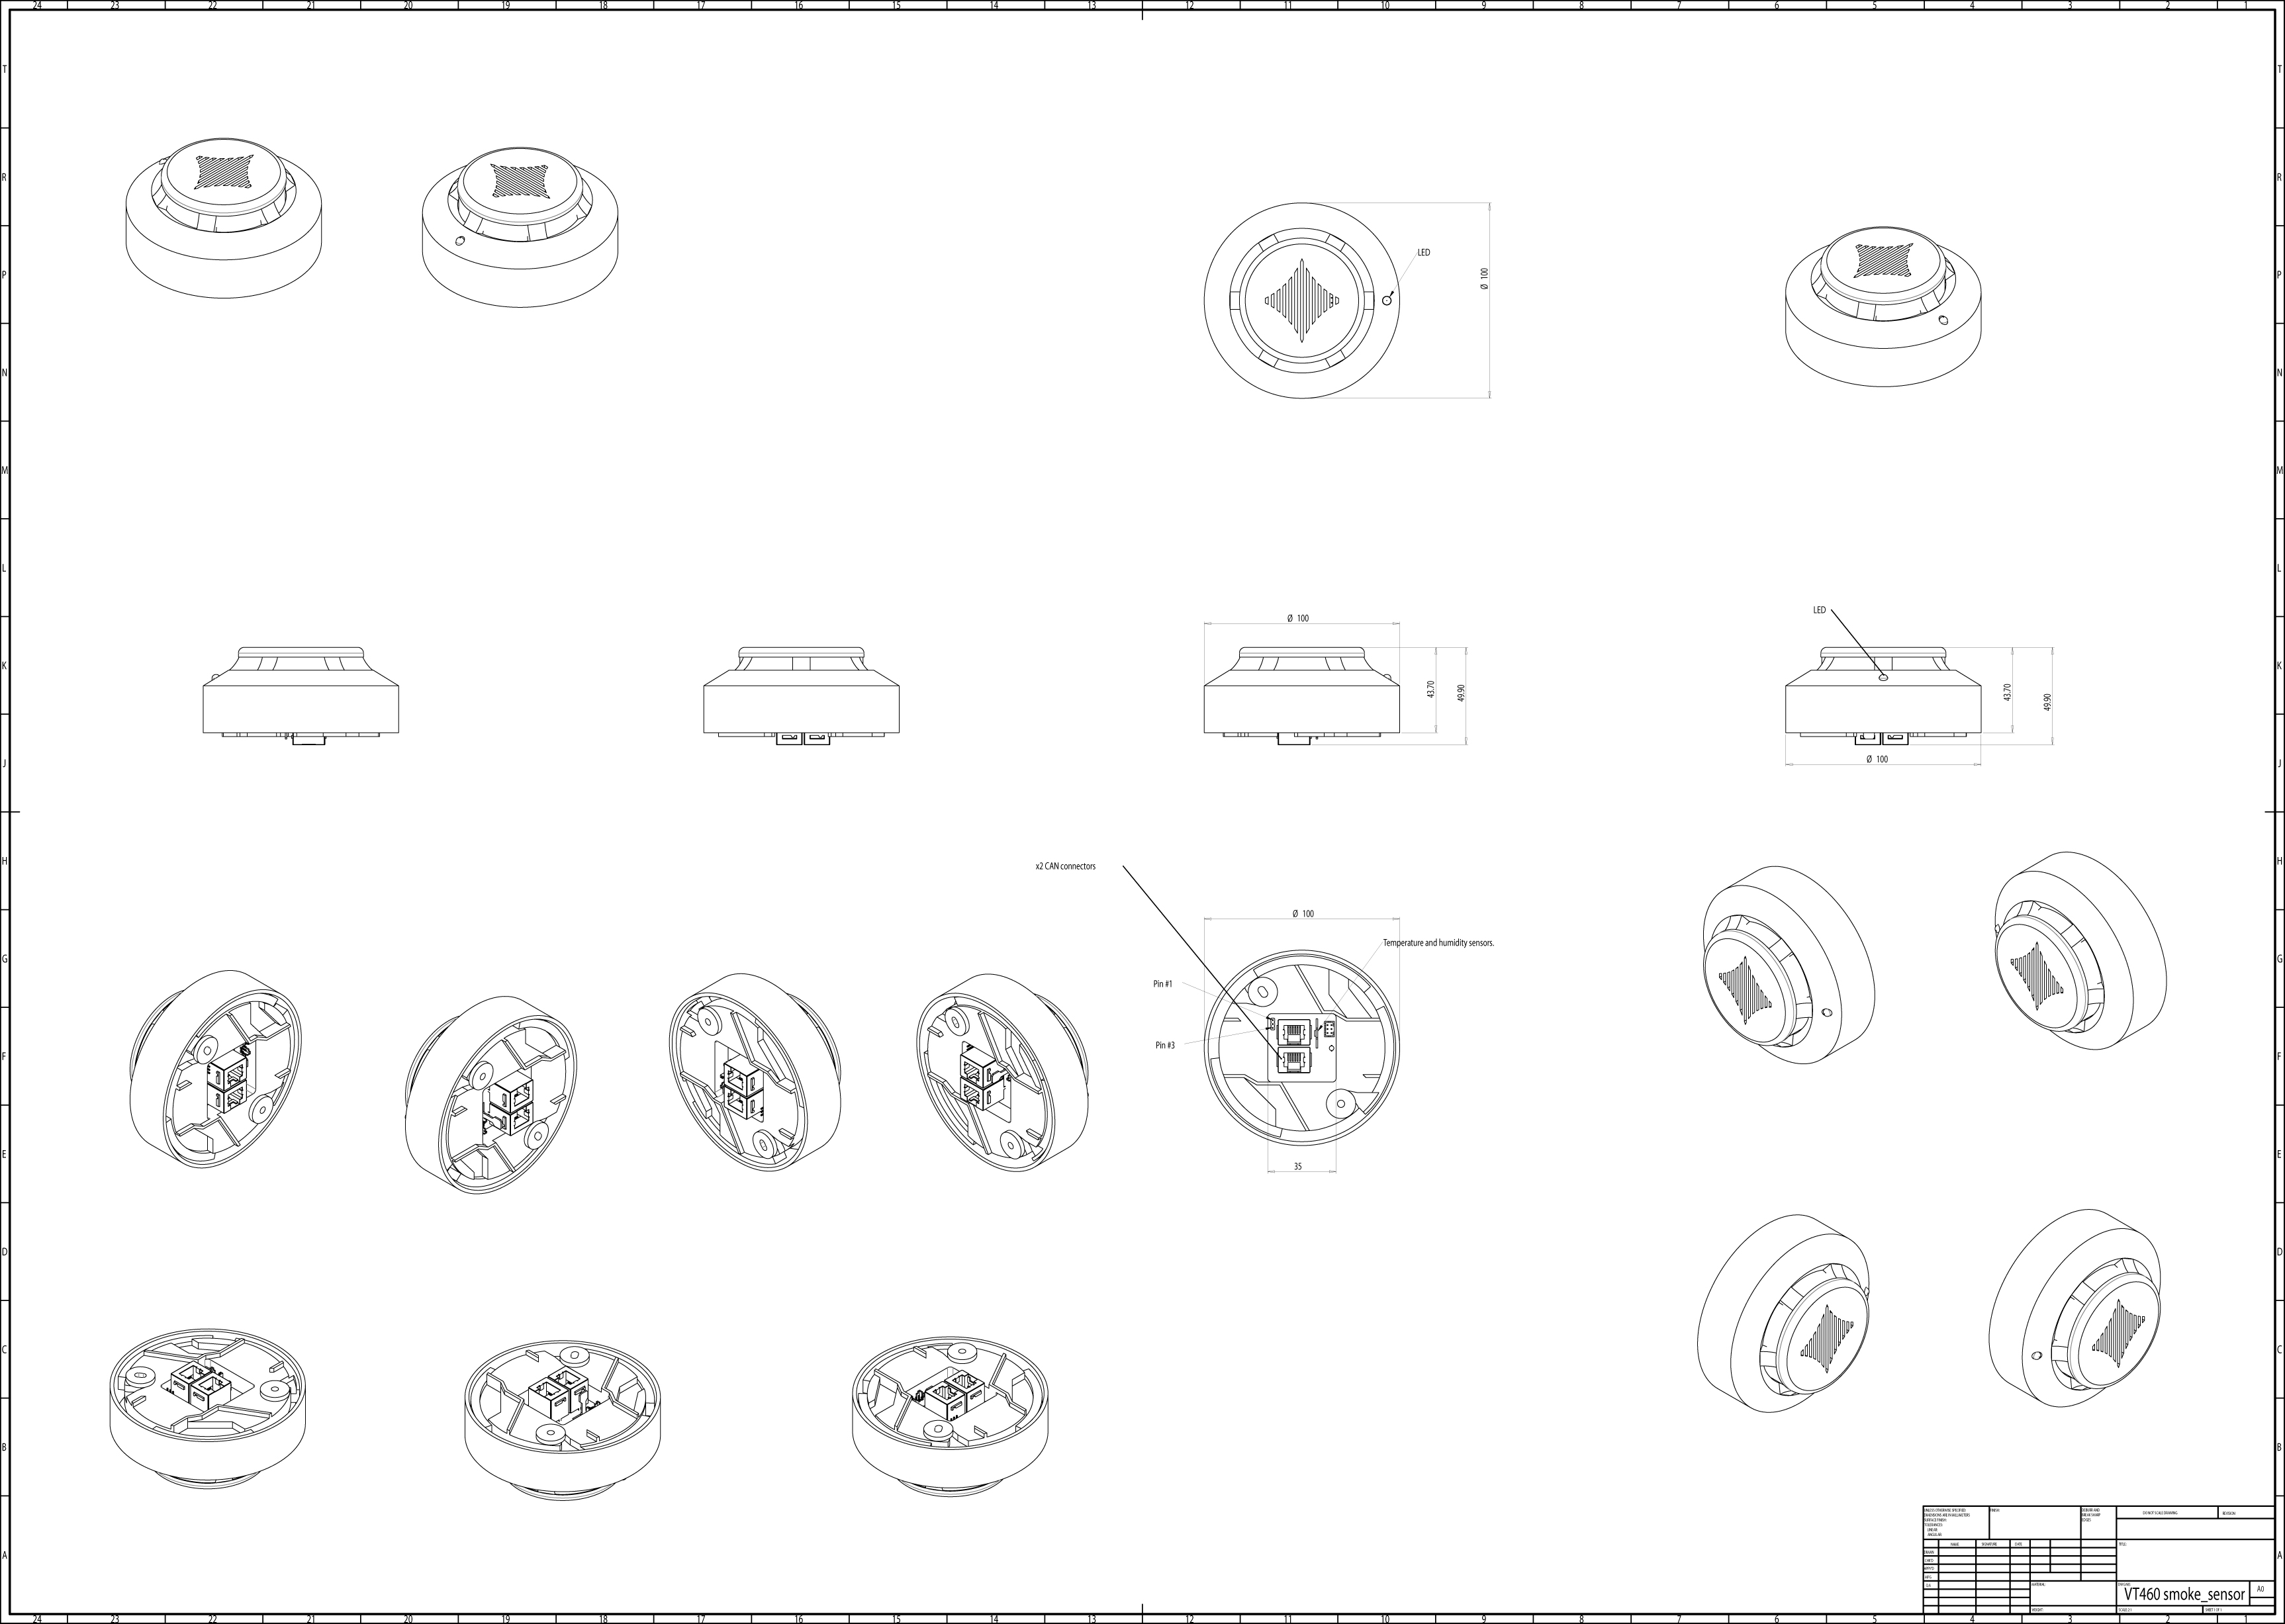
From the picture above:
Temperature & humidity sensor
CAN bus ports
Pinheads (3 pins)
LED (More info in the "LEDs section" in the article: CAN devices connection)
The sensor can not be used on its own. It must be used together with Vutlan monitoring systems. |
Installation procedure
Notes on assembly
It is vital to ensure that the smoke alarm is always assembled with the sensor head pointing downwards. In any other position, there is no guarantee that smoke will be detected.
The smoke alarm must also be positioned so that it is ventilated with an adequate amount of air and the ventilation slots are not covered.
Installation with the mounting plate provided
The sensor is installed using the mounting plate provided.
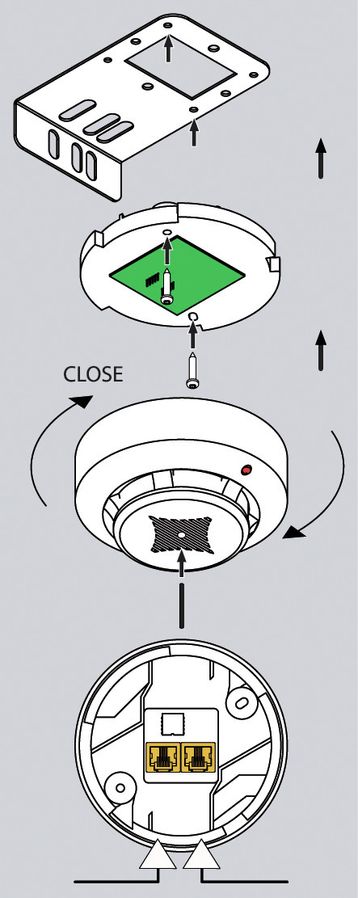
Uncover the smoke detector head from the base.
Attach the smoke sensor base to the mounting plate using the M4 x 10 screws provided.
Replace the sensor head onto the base and secure it by twisting it until it locks home.
Secure the mounting plate to the enclosure frame using the 4.8 x 19 screws.
Remove the red protective cap!

Drawings
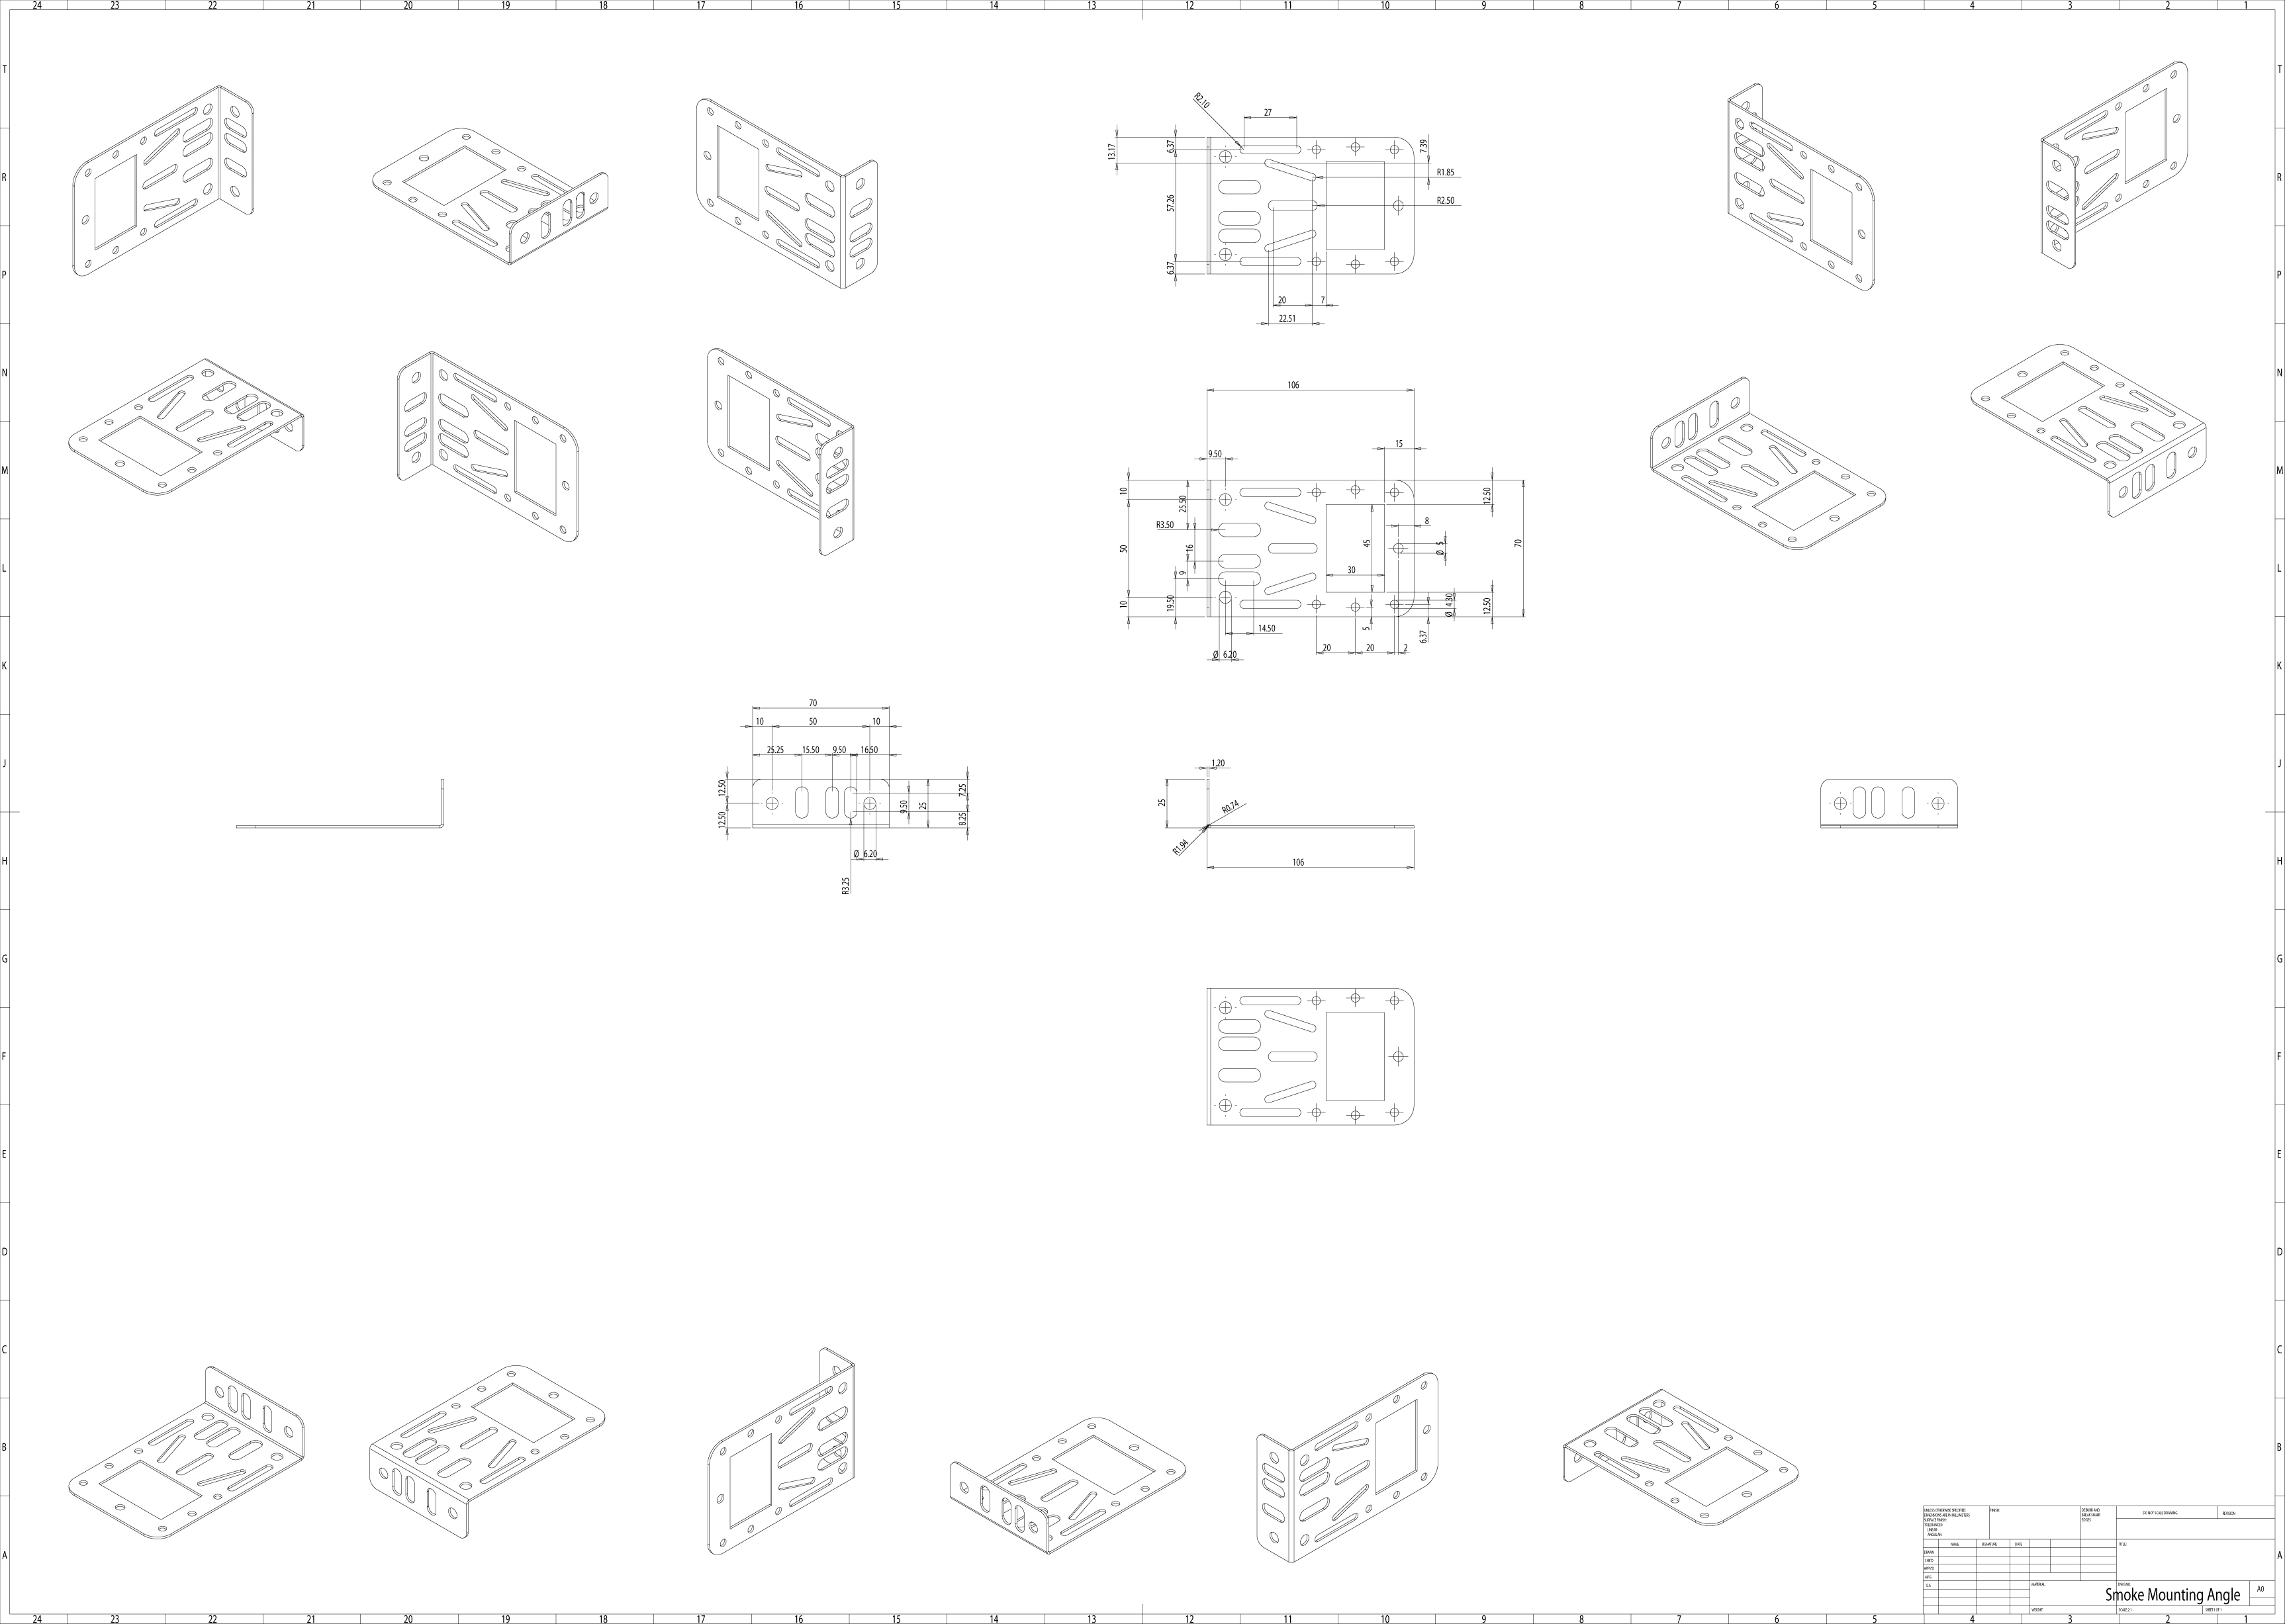
Connecting sensor
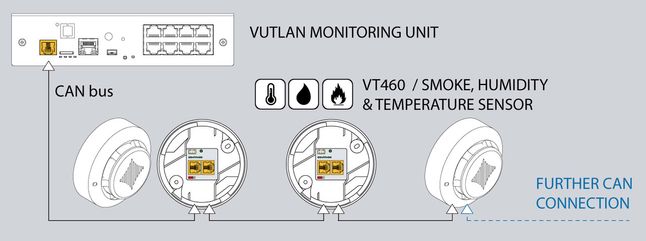
Connect one end of the RJ11 / RJ12 cable to the monitoring unit CAN port and the other end to any CAN input of the smoke sensor. It is possible to connect up to 10 sensors to one CAN port. To do so connect a new RJ11 cable to a free input of an already connected smoke sensor and the other end to the next smoke sensor in a chain. See the picture below. RJ11 or RJ12 cable pinouts can be found in the picture below. After the system starts, configure the CAN bus, after configuration, the LED on the smoke detector will blink dimly once a second.
Now we need to switch TR to position OFF for all sensors except the last sensor. And switch TR to the OFF position for the last sensor.
Depending on the version of VT460, please choose the below picture to help you accomplish that.
Case | Diagram | Description |
|---|
1 | 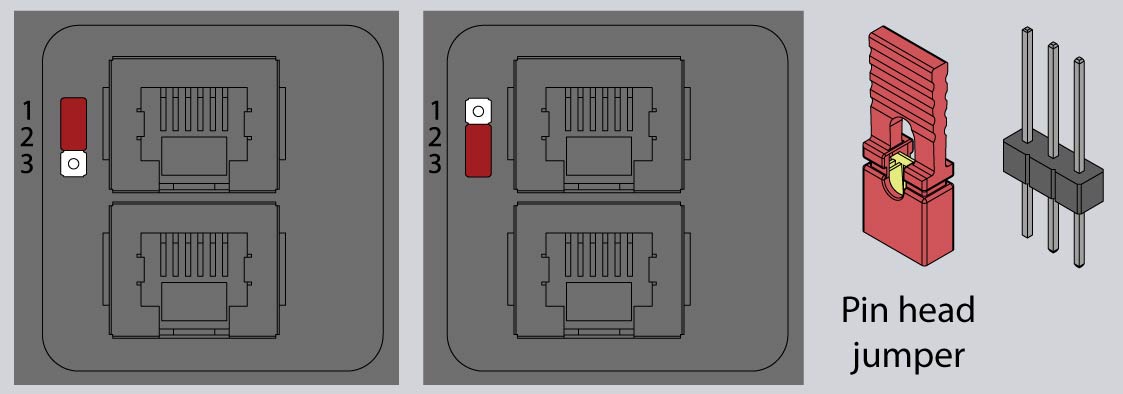 | Older VT460 sensors use a pin head jumper. a) For all sensors except the last sensor in the chain put "pinhead jumper" on pins: 2 and 3. TR is OFF. b) For the last sensor in the chain put "pinhead jumper" on pins: 1 and 2. TR is ON. |
2 |  | Newer VT460 sensors use a slide switch. a) For all sensors except the last sensor in the chain switch the slide switch UP to turn up. TR is OFF. b) For the last sensor in the chain switch the slide switch to the BOTTOM/DOWN. TR is ON. |
Connecting CAN sensors

Testing the smoke sensors
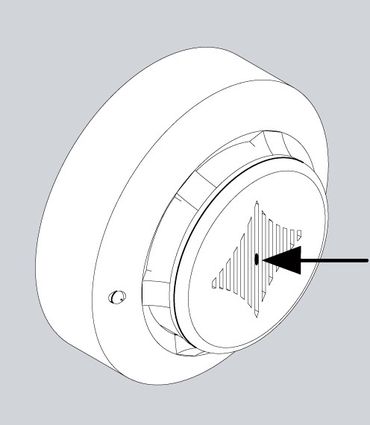
During system operation, take a needle or paper clip and insert it into the hole on the cover of the sensor, try to move it there until the blinking dimly LED flashes brightly. That means that the sensor is in a good state. After inspection, return the sensor /s to a normal state. To do this, either disconnect them from the system, or in a system interface, go to the smoke sensors tab, and restart them.
False alarms
Avoid high-frequency noise and the impact of dust on the sensor, the noise and dust cause false alarms.
Technical specifications
VT460 |
|---|
Dimensions | Ø100×45 mm |
Weight | 290 g |
Inputs | 2 x RJ-12 |
Operating temperature | Min. -10° C, Max.80° C |
Operating humidity | Min. 5% - Max. 95% (Non-Condensing) |
Power consumption | 100 mW |
Status Indicators | Red LED |
Max. distance m | 225 m |
HS Code | 8531 10 950 |
Components | Manufactured in E.U. |
Special Features | Daisy chain |
Mounting | On the сeiling |
Safety instructions
Please observe the valid regulations for installation in the country in which the smoke alarm is installed and operated and the national regulations for accident prevention. Please also observe any internal company regulations, such as work, operating, and safety regulations.
The technical specifications and limit values stated must not be exceeded under any circumstances. In particular, this applies to the specified ambient temperature range and IP protection category.
If a higher IP protection category is required for a special application, the smoke alarm must be installed in an appropriate housing or an appropriate enclosure with the required IP protection category.
Configuring CAN sensors

Copyright:
Vutlan s.r.o.
Remote Infrastructure Monitoring and Control
43 ul.Svornosti, 821 06 Bratislava,
Slovak Republic, E.U.
www.vutlan.com


